Quantcast
Affichage des articles dont le libellé est astuces. Afficher tous les articles

20 novembre 2015

fresh after PE | survival guide

Depending on your level of commitment in gym class, but you can sometimes leave fresh as a rose (like when you did goalie and your team’s defense was realllly good) or sweaty and stinky and just feeling disgusting and not wanting to go on with the rest of your day(like after a hardcore crosse game). If you’re lucky you can take a shower after, but with my experience, there’s no time for that or just no doors on the showers. Here are my 5 steps to feeling fresh:

1. Get undressed. I start with the clothes that are the most sweaty (EWWWW! But, true.) like socks and t-shirt, use those clothes to wipe the sweat and then let those body parts breathe a little before putting my uniform back on. You might look weird hanging out in your bra, but it’s necessary if you don’t want your normal clothes to be sweaty. Also, good time to start the “Where did you get that bra” convo that always happens in the girl’s lockers.
2. When I wait to cool off, I put on some deodorant, like this travel-size one I got at Wall-Mart. Don’t be the smelly kid.
3. After I’m all dressed I go in front of the mirror and use one of these H&M’s wet wipes that smell so good. I use it to freshen up my face, trying not to remove my eye makeup. Next time you wait in the line at H&M to pay, grab one of these!
4. I spray dry shampoo in my roots, undo my ponytail and do a few hair flips. I also got this travel-size at Wall-Mart.
5: Wash your hands. Usually they get pretty dirty from the balls and the rock climbing grips and the tennis racquets and the sweats and ewwww. Again, so disgusting, don’t forget that step or you will fall asleep on those hands in math class.


You’re now feeling good. You now smell good. You’re now looking good. Take your water bottle to your next class and no one could ever tell that it took you everything to do that Cooper test. Well done, athlete buddy ;)

Mon petit guide pour se sentir propre après un cours d'édu ainsi que mes produits essentiels.
B.G.

4 juin 2015

How to | Personalised white balance and camera accessories

Today in the part 2 of my DSLR guide, I wanted to show you an extra adjustment and the accessories I use. Read part 1: How to settle your DSLR on manual.
Aujourd’hui, pour la deuxième partie de mon guide DSLR je voulais vous montrer un dernier réglage plus compliqué et les accessoires que j’utilise. Lisez la partie 1 : Comment régler son appareil sur manuel

Personalised white balance | balance des blancs personnalisée

The personalised white balance can be very useful when none of the automatic settings work, anywhere with a complex/ weird lighting or when you really want the whites to be white. Here’s how to make this adjustment:

1.       First, get on the manual setting then put your lens on manual focus (MF) instead of auto focus and on automatic white balance.
2.       Take a white piece of paper, position it where you’re going to take the picture (on automatic white balance) and take a picture of it. Try having nothing else in the picture and then set your lens back to AF.
3.       Change your white balance to Personalised, then click on menu<W. Balance perso. <click “set” to the picture of the white paper. Your basically saying to the camera: This might not appear white, but it is, so make everything else work with it.
4.       Then take your picture and see the difference!
La balance des blancs personnalisée peut être très utile lorsque vous travaillez dans un environnement où aucun des réglages automatiques ne rend justice aux couleurs réelles, où l’éclairage est complexe et quand vous voulez vous assurez que les blancs sont blancs. Voici la marche à suivre :

1.       Premièrement, sur le mode manuel, ajuster votre lentille sur focus manuel (MF) au lieu de focus automatique (AF)
2.       Prenez une feuille blanche et positionnez-la ou vous voulez faire votre photo et prenez-en un cliché en essayant qu’elle occupe tout l’espace du cadre.
3.       Changer votre balance des blancs sur personnalisé, ensuite cliquez menu<B. blanc personnal.<cliquez « set » sur la photo de la feuille. Vous êtes en train de dire à votre caméra : ça n’a peut être pas l’air blanc, mais ce l’est alors ajuste les autres couleurs avec.
4.       Prenez votre photo et voyez la différence!

My accessories | Mes accessoires:

1.    Blu-Tack | Gommette bleue
For flat lays
Pour les plans « vol d’oiseau »
2.    Extra battery and memory card (forgot that!) | Extra pile et carte mémoire (que j’ai oubliée!)
3.    Mini tripod | Min- trépied
Perfect for traveling, time lapses, making your videos less shaky or long exposure shots. Parfait pour voyager, les prises de vue accélérée, avoir des vidéos moins chancelants et les photos à longue ouverture.
4.    Charger | Chargeur
5.    Big tripod plate | Plaque du gros trépied
6.    Protecting cover | Housse de protection
Really convenient if you don’t like the look of camera bags, it’s enough protection to carry your camera in your purse or backpack. Vraiment pratique si vous n’aimez pas le look des sacs de caméras, c’est assez sécuritaire pour transporter votre appareil dans votre sac.
7.    Remote control | Télécommande
Again, this helps for long aperture shots because you won’t shake the camera when you start the picture, also great for stop motions and makeup tutorials. Très utile pour les photos à longue ouverture pour réduire le mouvement de l’appareil quand on appuie sur le déclencheur, tout autant pour les stops motions et les tutoriels maquillage.

B.G.

26 mai 2015

That time of the year: Final exams

 Mon cartable de révision
Mon plan de révision
As I know most of you like me are (or should be) preparing for final exams, I thought I make resurface the 2 advice posts I wrote last year. This year since I had a lot more work so I took inspiration of a classmate and put together a revision binder with all the documents, notes and exercises I need to do before the exams. Good revision!


Comme moi, plusieurs d’entre vous sont (ou devrait être) en pleine révision pour les examens finaux, j’ai pensé que ce serait le bon moment de vous rappelez les 2 billets que j’ai écrit sur ce sujet l’an dernier. Puisque la charge de travail est plus lourde cette fois avec 6 examens, je me suis inspirée d’une camarade et je me suis organisée un cartable d’étude avec tous les documents, notes de cours et exercices à faire. Bonne révision!


B.G.

21 avril 2015

Crème glacée limonade sucrée | décoration de gâteaux

Bonjour tout le monde! Re-bienvenue sur mon blogue, pour repartir du bon pied après cette petite absence maladie, quelques idées pour décorer cupcakes et gâteaux :
Hello friends! Welcome back on my blog, to restart things after this small sick leave I have a few cake decorations ideas:


Je crois qu’une bonne liste de lecture est un élément primordial, car c’est à la portée de tous de réussir des gâteaux dignes de Pinterest, mais il faut en avoir la patience! Et la musique rend tout plus agréable.

I think a good playlist is primordial to any baking because anyone can make a Pinterest worthy cake but you need the patience. Music makes everything better.


Ensuite, ma mère avait préalablement cuit et réfrigéré les gâteaux, ils étaient donc à la température idéale pour le crémage, que nous avions choisi de faire menthe (mais il a tourné turquoise) pour les 40 ans de ma tante.


After that, my mom had already baked and refrigerated the cakes so they were at the perfect temperature for the icing, which we chose to make mint (turned out more turquoise) for my aunt 40th birthday.


Truc pour glacer son gâteau : passer régulièrement votre couteau sous l’eau chaude de manière à le rendre propre et à faire légèrement fondre le glaçage et à le rendre lisse.


Icing trick: Pass your knife regularly under hot water to keep it clean and to slightly melt the icing for a smooth result.


Puis, en tant que responsable du fondant, j’ai préparé mes couleurs avec un colorant alimentaire spécialement pour la pâtisserie. Ne vous laissez pas intimider par le mot fondant, pensez-y comme une pâte à modeler comestible (même si on a tous goûté celle qui ne se mange pas). Le plus délicat c’est de la garder à la bonne température pour qu’elle soit malléable, mais pas collante, je l’ai donc re-réfrigéré quelques fois en cours de route.


Then, as the official fondant manager, I prepared my colors with a pastry coloring. Don’t be intimidated by “fondant”, think of it like eatable Play Doh (even though we all ate Play Doh). The trickiest thing is to keep it at the good temperature for it to be mouldable but not sticky; you may have to put it back to the fridge.


Voici ma déco melon d’eau, vraiment facile! Si vous voulez rajouter des confettis de sucre, mettez un peu d’eau préalablement pour mieux les coller.


Here my watermelon deco, super easy! If you want to add sugar sprinkles, wet the fondant a little beforehand to help it stick.


 Ficelle +collant washi  + perles de chez Suc’ Déco

Thread+washi tape + beads from Suc’ Déco


B.G.
8 avril 2015

Super nanny | advices from a pro babysitter

Hello everyone,
Today I wanted to talk about babysitting; I have made a post called Supernanny| 15 babysitting tips covering how to find clients, how to make the parents and kids like you, that kind of basic stuff. Today is about tricks I’ve learned since that makes it the easiest job ever.

Coucou!
Aujourd’hui je voulais revenir sur le sujet du gardiennage, j’ai déjà écrit Supernanny | 15 astuces pourle gardiennage où j’expliquais comment se trouver des clients, quoi faire pour plaire aux parents et aux enfants ce genre de choses. Mais aujourd’hui, je voulais partager des trucs que j’ai appris depuis qui en font un travail archi facile.

When you don’t know what to do 

Quand vous ne savez pas quelle activité faire

#1

Movie Night, I bring my collection of kids movies, I make sure they’re a few older that they haven’t seen and then midway through it you pause and say “I make popcorn and you go put on your pajama” SO EASY

Soirée cinéma, j’apporte des films de chez moi et je m’assure qu’il y en a des plus vieux que les enfants n’auront jamais vus, à la moitié du film je pause et je leur dis d’aller se mettre en pyjama pendant que je fais du popcorn SUPER FACILE
#2

Bringing my mom’s scrapbooking supplies, like a bunch of stamps, or punchers or perler beads
J’apporte des étampes, des poinçons ou les billes de plastique qui fondent et je m’amuse à leur montrer comment faire
#3

Showing videos on Youtube, once they are 7-8 they love pop music and they like to show them to their friends afterwards. Usually Katy Perry, 1 Direction and Meagan Trainor do it.

Je leur montre des vidéos sur YouTube quand ils ont 7-8 ans, ils aiment les vidéoclips parce qu’ils peuvent les montrer à leurs amis après. Habituellement, j’y vais pour Katy Perry, 1 Direction et Meagan Trainor.
#4

Make a city with their toys with little cars and all, it hard to sit on the floor and to clean up but it can occupied them for a few hours and it put new interest in tows they’re bored of.

Faire une ville à partir de leurs bonhommes avec des p’tites autos et tout, c’est dur d’être assis par terre et de ranger, mais ça les occupe pendant des heures et ça redonne de l’intérêt aux jouets dont ils se sont ennuyés


When they don’t want to sleep
Quand ils ne veulent pas dormir

My trick for this is kinda creepy but always works. If they get up a few times pass their bedtimes, I go in the room sit on the opposite side of the room, look at them and wait. I repeat them to close their eyes and to stop talking. At first they will try to fake sleeping till you get out but wait longer and they’ll fall asleep for real. O.K. now that I wrote it down I do sound like a terrible baby sitter but I swear I’m the lovely kind with overalls and Lego skills.

J’ai une technique quelque peu étrange, mais 100% efficace. S’ils se lèvent à plusieurs reprises après l’heure du coucher, je m’assois dans le noir dans leur chambre,  je les fixe et s’ils ouvrent les yeux je leur dis « dormez! ». Au début ils essaient de faire semblant pour que je m’en aille, mais je reste assez longtemps pour qu’ils s’endorment pour de vrai. O.K. maintenant que je viens d’écrire ça je me rends compte que je sonne comme une abominable gardienne, mais je vous jure que je suis du genre timide qui porte une salopette et est super bonne en LEGO.

When they’re out of control
Quand ils sont hors de contrôle 

I let them be wild and run around, I’m not their parent! If they don’t listen to me I put them in their room and say like “I’m gonna tell your mom” they get very afraid of that and they become nice and cute again.

Je les laisse devenir fous la plupart du temps, je ne suis pas un parent et ça ne me fait rien s’ils crient et courent partout. Mais s’ils n’obéissent pas, je les mets dans leur chambre et je menace d’appeler leurs parents et ça leur fait super peur et ils redeviennent gentils.


When they’re shy
Quand ils sont gênés


When you arrive and it takes a while for the parents to leave and you want to show them how good you are with kids but they are super shy, I usually go with these conversation topics:

Quand j’arrive dans une maison et que les parents prennent du temps à partir et que je veux leur montrer que je suis bonne avec les enfants qui sont à ce moment-là super gênés, je me lance dans l’un de ces sujets de conversation :

What shows do you listen to? What’s your favorite? Do you watch _____?

Quelle émission écoutes-tu? Est-ce que tu écoutes ____?

Qu’est-ce qui est meilleur entre ___ et ___? N’importe quel débat du genre pomme/orange

What’s the best between ___ and ___? Any apple/orange debates

Can I see your toys, and then, who gave you that, who is that superhero, what is his power...

Est-ce que tu peux me montrer tes jouets, qui t’a donné ça, c’est quel superhéros…

When they miss their parentsQuand ils s'ennuient de leur parents


Children can easily go from on emotions to another, so distract them by asking for a house tour or acting in a funny way and they will forget about. It’s important to distract them before they begin being sad, be quick!

Les enfants passent rapidement d’une émotion à l’autre, donc distrayez-les en demandant un tour du propriétaire ou agissez de façon drôle et ils vont oublier d’être triste. C’est plus efficace si vous les distrayez avant qu’ils deviennent tristes.

Also always clean up 1 or 2 hours before they hour the parents told you in case they arrive early and leave the house cleaner than it was.

Aussi ranger tout 1 à 2 heures avant le retour des parents au cas où qu'ils aient de l’avance et laisser toujours la maison plus propre qu’à votre arrivée.


So that was it! I hope you will meet nice families that appreciate you, THAT makes it the easiest job!

Voilà tout! J’espère que vous rencontrerez de gentilles familles qui vous apprécieront, c’est ce qui en fait le travail le plus facile!

B.G.

26 mars 2015

Nail art techniques: my tips to make it work


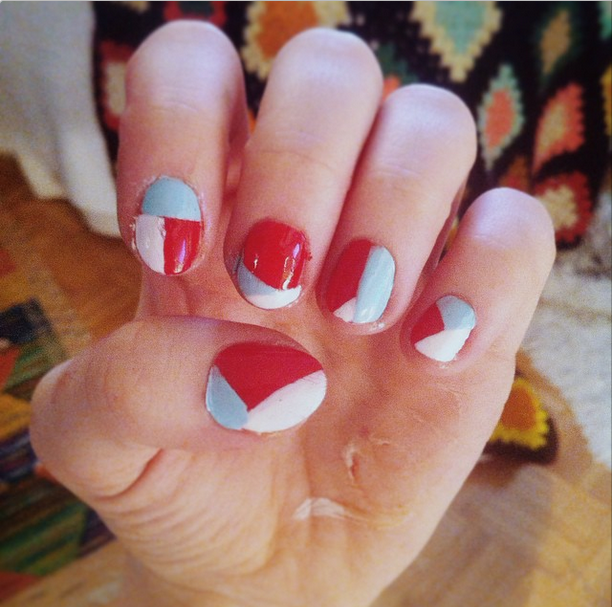
Ça fait un moment que je n’ai pas parlé nail art ici, et depuis j’ai appris plusieurs techniques (ou du moins j’ai enfin réussi certaines techniques). Soit comment vraiment réussir un motif à poids, tracer les lignes parfaites ou même la technique du scotch tape qui a ruiné plus d’une manucure, voici ce que j’ai appris :

It’s been a while since I’ve talked about nail art here and since then, I’ve learn a few techniques (or at least, I finally got them right). From how to really succeed a dot pattern, draw the perfect stripes to the scotch tape technique that ruined more than one manicure, here’s what I learned:


Pois | Dots 


Les pois sont l’un des motifs les plus basic en nail art, mais c’est quand même difficile de réussir cette technique à la perfection. Cette vidéo d’une youtubeuse française que j’aime bien, Yoko nail art m’a appris plusieurs trucs. Notamment, on peut arrondir un cure dent avec une  lime à ongles pour faire des poids plus gros, qu’il faut nettoyer son dotting tool au fur et à mesure pour que les poids gardent la même grosseur et qu’il faut éviter d’utiliser un verni gluant. Depuis, j’ai réussi un ongle quasi parfait qui m’a valu plein de compliments!
Dots are one of the most basic patterns in nail art, but it can be a struggle to make it perfect. This video from a French Youtuber that I enjoy, Yoko nail art learned me a few tricks like to round of a toothpick to make the dots bigger, to clean your dotting tool after a couple of dots and to avoid half dried nail polish. Since then, I even made an almost-perfect design that got me lots of compliments!

La vidéo | The video : https://youtu.be/2I0SWjmT6V8


Lignes | Stripes

Le secret des lignes, c’est le pinceau. Soit un qui vient avec un vernis moins épais, sous forme de stripper ou bien un pinceau seul qui peut s’utiliser avec n’importe quel vernis. Il faut y aller avec une pression constante, plus ou moins forte selon la largeur des lignes désirées et littéralement « coucher » le pinceau sur l’ongle.

The secret ingredient behind stripes is the brush. It could be one who comes with a thin polish, a nail art stripper or a brush that comes on its own that can be use with any color. You have to go with a steady pressure, more or less strong depending on the width you want et literally lie the brush down on the nail. 


Coller des pierres | Gluing gems

J’ai déjà fait une vidéo tutoriel là-dessus, mais après quelques erreurs, j’ai de nouveaux trucs. Premièrement, si vous utilisez des pierres pour scrapbooking, c’est important de retirer l’autocollant au dos, sinon c’est lui qui sera collé à l’ongle et la pierre s’en détachera facilement. Sinon, c’est une bonne idée de mettre du topcoat par-dessus, pour une plus longue durée.

I’ve already made a video tutorial on this but after a few more mistakes, I have new tips. First, if you use scrapbooking gems, it’s important to take of the little stickers on the back, or then it’s the sticker who will be glued to the nail and the gem will fall off quickly. Otherwise, it is a good idea to put topcoat on top of the gem for a long-lasting result.

La technique scotch tape | The scotch tape technique

J’ai eu au moins 3-4 « fail » avec cette technique, le vernis s’arrache ou n’est même pas droit! Ma solution : le tape washi, beaucoup moins adhésif, et sa texture papier fait sécher le vernis plus rapidement.

I’ve had at least 3 fail with this technique, the nail polish goes off with the tape or the lines are not even straight. My solution: washi tape, a lot less sticky and the paper texture helps the varnishes dries faster.


Dessins | Drawings

Maintenant, je fais une bonne partie de mes illustrations avec de la peinture acrylique, car j’ai accès à une multitude de couleurs opaques -comme les bruns et les verts, je n’ai pas besoin de dépenser pour chaque couleur, je peux faire des mélanges-, donc mes personnages sont plus fidèles. Un autre aspect pratique c’est que si vous faites une erreur, vous pouvez frotter la peinture avec un coton-tige mouillé et ça s’effacera sans enlever votre couche de base. C’est juste bien important d’appliquer un vernis de protection par la suite.

Now, I make a lot of my illustration with acrylic paint because I can mix any color - who want to spend on brown and green nail polish- and the colors can be truer to my characters. Another perks of this material is that you can erase your mistakes with a soaked cotton bud. Don’t forget to put your topcoat though!


C’est tout pour mes nouvelles connaissances, je prévois essayer le marbling même si c’est salissant et aussi d’acheter du stripping tape et des breloques! Si vous êtes aussi adepte de nail art, faite moi signe pour qu’on se suive sur Instagram, et jetez un coup d’œil à mon tableau pinterest sur le thème!

So there was my new knowledge, I’m planning on trying water marbling and to buy stripping tape and more studs! If you are a nail art enthusiast too, get in touch with me to follow each other on insta and take a look at my nail art inspirationboard on pinterest!

À la prochaine!


B.G.

16 juillet 2014

5 tips to photograph products


J’aime beaucoup faire des photos de produits de maquillage mais les trucs suivants sont utiles pour photographier n’importe quels produits.

I like taking pictures of makeup products, but these tips can be used to photograph any objects.

Portez attention aux détails / Pay attention to details


Il n’y a rien de pire que de se rendre compte qu’il y a une empreinte de doigt sur le miroir du boîtier une fois que les photos sont transférées sur l’ordi (ça m’est déjà arrivé!). Conséquemment, vérifiez si votre arrière-plan est propre, que votre cadrage est O.K. et que le devant de votre produit est visible (s’il s’agit d’un objet rond qui roule partout, maintenez-le en place avec de la gommette bleue). N’oubliez pas  tous ces détails qui font la différence entre une bonne photo et une photo PARFAITE.

There’s nothing worse than discovering, once your pictures are transferred on your computer, that there’s a fingerprint on the mirror of the powder you spent hours photographing (it happened to me!). Consequently, check if your background is clean, that your centering is ok and that the front of the product is visible (use blue tack if it rolls everywhere). Don’t forget all those little details that makes the difference between a good and a PERFECT picture.

Fabriquez un arrière-plan intéressant / Craft a stunning background

flowers, fabric or a book cover can make a good backgrounds

L’arrière-plan peut ajouter de la couleur à un packaging ennuyant ou même aller avec le thème de votre shooting. J’aime utiliser des bouts de tissus avec un imprimé ou un fond basic très flou. Pour réaliser cet effet flou, vous devez ajuster la profondeur de champ (indiquée par le chiffre à côté du gros F sur la caméra) au plus bas possible et éloignez le sujet le plus possible de l’arrière-plan. Si vous avez un zoom, utilisez-le au maximum en vous éloignant du sujet et faites la mise au point sur votre produit. Le résultat devrait être génial, même si ce n’est que la pelouse de votre jardin ou votre tête de lit.

This is actually a Barbie accessories!

A background can add color to a boring packaging or even go along with the theme of your shoot. I love using a piece of fabric with a cool print or a really basic background but very blurry. To achieve this blurriness, you have to adjust the depth of field (the number beside de big F) as low as possible and also take away the subject from the background. If you have a zoom, use it at maximum, step back and then make the focus on your product. The result should be awesome, even if it’s just grass or your bed behind.

Prenez votre temps (au propre comme au figuré) / Take your time (both literally and figuratively)


Quand votre sujet est un objet, vous avez toute la liberté de prendre le temps de créer une photo intéressante. Cela veut aussi dire que vous pouvez augmenter votre temps de pose et mettre votre caméra sur un trépied pour assurer une bonne qualité d’image (gardez l’ISO au plus bas possible).

When your subject is an object, you have the liberty to take all the time to achieve the perfect shot. This also means that you can increase exposure time and use a tripod to assure a good quality (so try to keep your ISO as low as possible).

Caméra, lumière, ACTION! / Camera, lights, ACTION!


L’éclairage est souvent le point le plus difficile à maîtriser. Il est préférable de photographier avec une lumière naturelle ou une lumière blanche pour que les couleurs des produits soient rendues avec authenticité; c’est très important pour les ombres à paupières et les rouges à lèvres! Sinon, réglez la balance des blancs en vous fiant à un objet blanc (comme une feuille). Si votre source de lumière est très forte, atténuez les ombres avec des réflecteurs ou des cartons blancs. Ils réfléchiront la lumière et la diffuseront vers les zones d’ombres. Il faut aussi être attentif aux reflets indésirables de lumière sur  les boitiers de plastique. Ma solution? Repositionner le produit jusqu’à temps qu’ils disparaissent.


Lighting is always the hardest thing to master. Try to choose natural lighting or white lighting or your colors won’t look like the actual product (especially for eye shadows or lipsticks)! If you can’t, adjust the white balance with the help of a white sheet. If you shoot with a strong source of light, like the sun at noon or a desk lamp, you can soften the shadows with a white screen (or white sheet) that will reflect the light and diffuse it where there are shadows. Besides, you have to be careful with unwanted flares that plastic cases make. My solution is to move the product around until they disappear.

Ajoutez votre touche personelle / Add your personnal touch


Mon dernier conseil est de tenter de réaliser une photo vraiment originale et à votre image. Quand un nouveau produit arrive sur le marché, tous les blogues semblent avoir la même photo, vue de haut sur un fond blanc. Il y a plein de façon de différencier les vôtres, avec des accessoires (qui aideront vos lecteurs à se faire une idée des dimensions du produit) ou en montrant comment vous utilisez ce pinceau/mascara/gloss.

My last advice would be to make your pictures standout from the crowd. When a new product comes out, every blog seems to publish the same pic from above on a white background. Try adding a contest with other accessories (they could help your readers understand the dimensions of the product) or by showing how you use the brush/mascara/gloss.

Que pensez-vous de ces astuces? En avez-vous d’autres? Partagez-les moi dans les commentaires!

What do you think of those tips? Do you have other ones to add? Comment below!

 B.G.

7 juillet 2014

How to wear a graphic t-shirt and where to find it!


Un t-shirt peut durer une éternité. Ils deviennent même plus beaux avec le temps, comme une veste en jeans ou une paire de converses. C’est un morceau qu’on porte pour toutes les occasions et s’il est vraiment comfo, pour la nuit aussi.

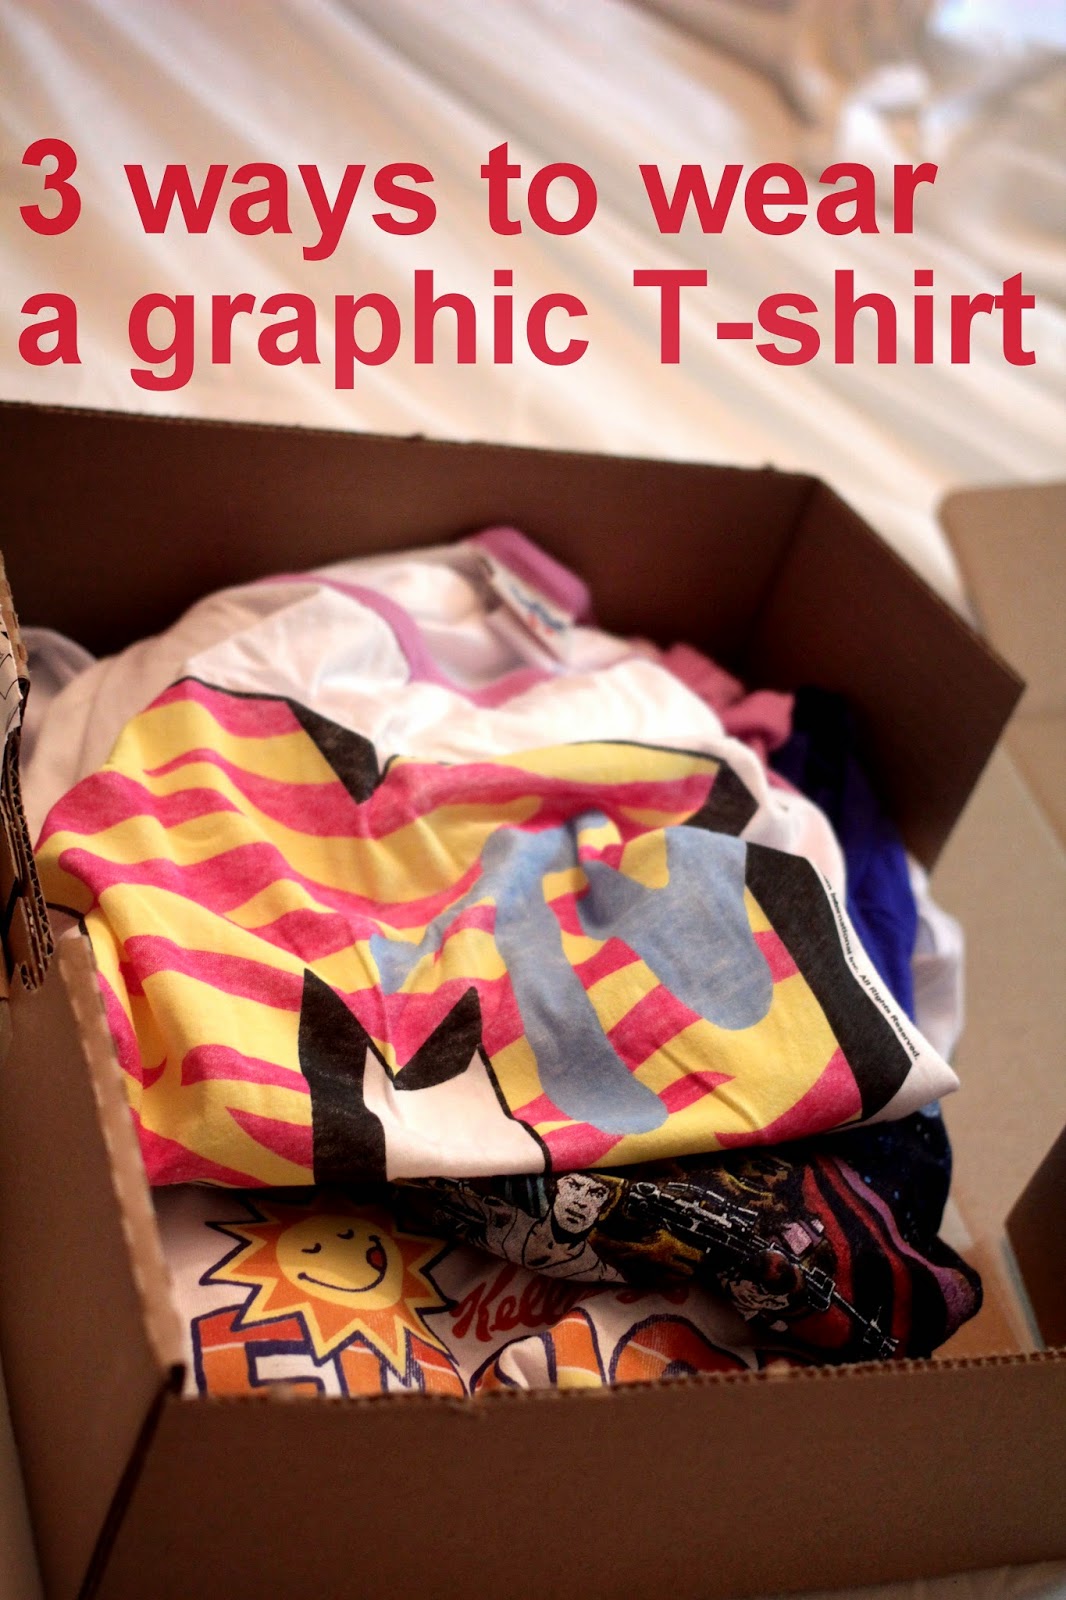
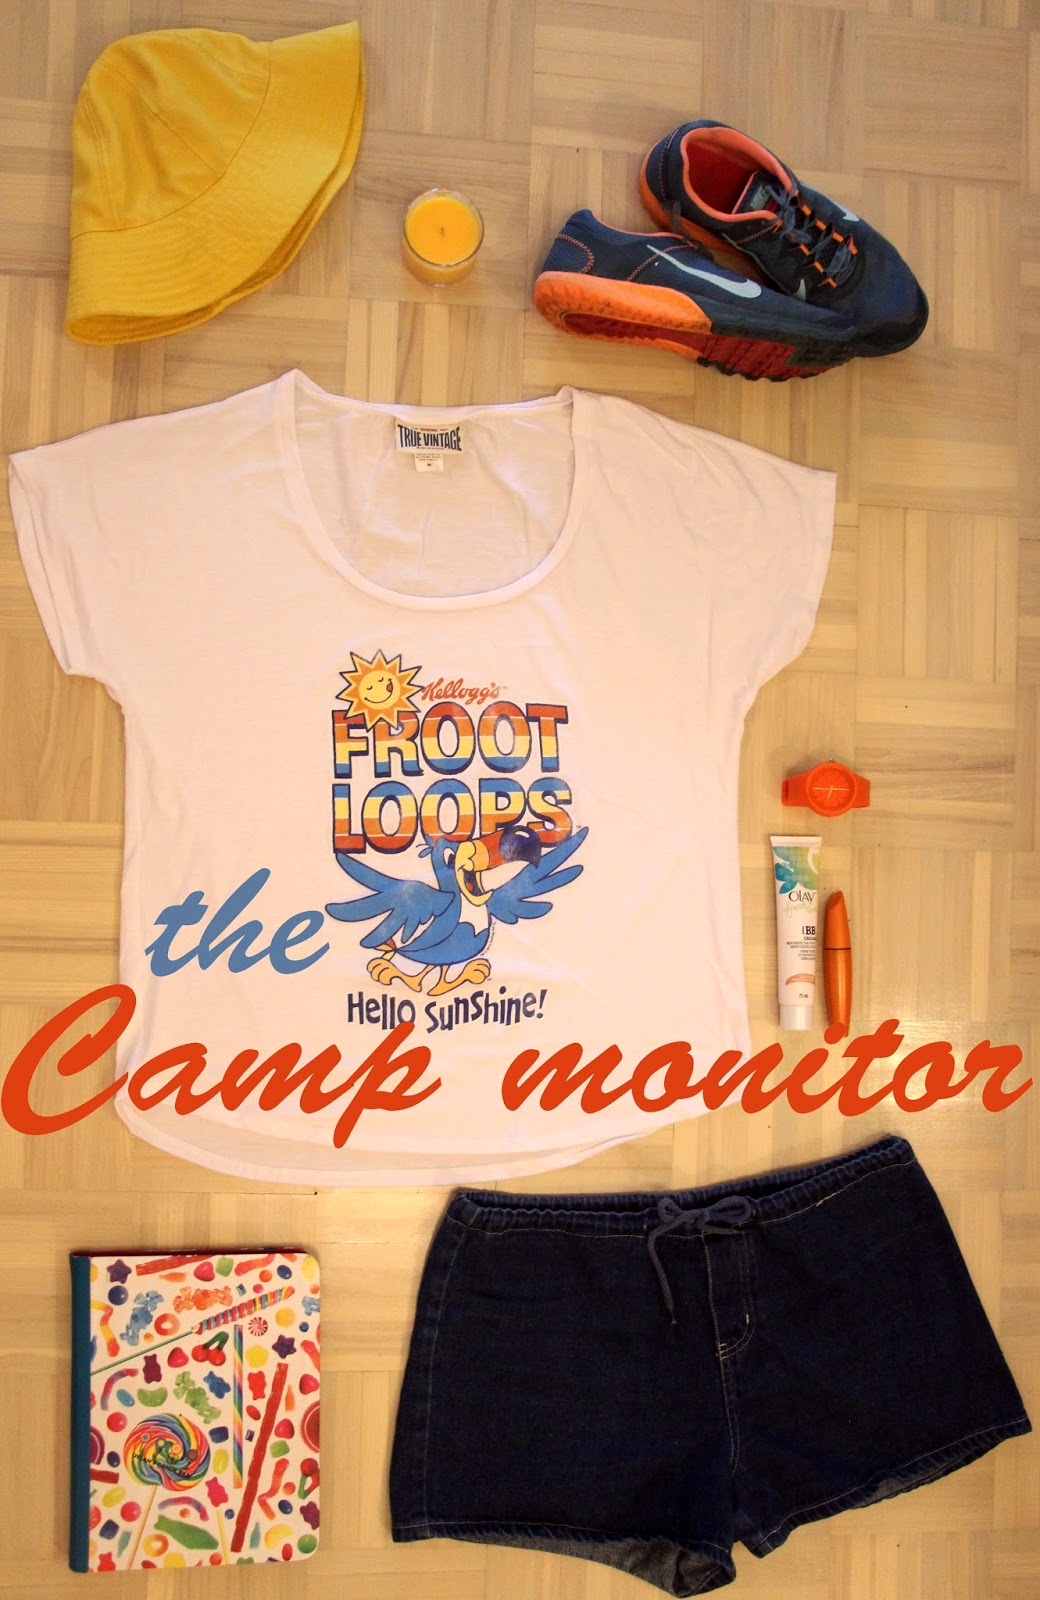
Durant les derniers mois, j’étais à la recherche de nouveaux t-shirts comme je pars pour un camp durant un mois, mais j’avais oublié une mode : les crop top. C’est rare de trouver quelque chose qui cache le nombril. J’avais presque abandonné mon idée quand HauteLook m’a envoyé une notification sur mon iPad pour annoncer une vente de Junkfood clothing. J’ai déjà eu un de leurs t-shirts et je l’ai adoré (jusqu'à temps qu’il soit trop petit et moussé). J’ai fini par acheter les trois ci-dessous (pour pas cher) et je les ai agencés comme je vais probablement les mettre les mois prochains.

A really cool t-shirt can last you for ages. It even becomes more beautiful with time, just like a jean jacket or a pair of converse. It’s a piece you wear on all sorts of occasions and if you find a truly comfy one, you might also wear it at night.

In the last month I searched for t-shirts as I am soon leaving for a one-month summer camp but I had forgot one thing: crop tops. It’s really hard to find something that goes your bellybutton! And when I had given up, I saw a notification from HauteLook, about a Junkfood clothing sale. I already owned a junkfood tee and I loved it so much! It’s really the perfect brand for a comfy and original t-shirt. I end up buying those 3 (for really cheap) and I styled them as I will probably wear them in the next few months. 


  • H&M skirt
  • Joe socks
  • Maybelline's Baby Lips
  • Modcloth sunglasses
  • The Wah's Book of nail Art (read review here)


  • Joe's Hat
  • Dylan's Candy Bar's Ipad Case
  • Thrifted shorts
  • Olay Fresh Effect BB cream (read review here)
  • Nike sneakers
  • Tommy Bahama's scented candle in Hawaiian Nectar

  • Wallmart flats
  • Topshop makeup (read review here)
  • Smartset sunnies 
  • New Icons of Fashion Illustration book
  • Forever 21 skirt

6 endroits pour trouver des t-shirts cool et originaux

6 places to find cool and original t-shirt


- La section pour homme (si vous aimez une coupe ample) ou pour enfant (si vous êtes petite)
The man section (if you like slouchy cut) or the kid section (if your small)

- Les friperies
Thriftshops

- Les ventes en ligne (comme HauteLook) ou des sites comme www.threadless.com et society6.com ( recomandés par mon amie Morgane)
Online sales (like HauteLook) or sites like www.threadless.com et society6.com (recommended by my friend Morgane)

- Les boutiques où on peut imprimer ses propres designs ou les ateliers de sérigraphie
Shops where you can print your own design or screenprinting workshop

- Les boutiques pour « skater »
« Skater » stores


- Les boutiques spécialisées en t-shirt (avant j’allais au Labyrinthe à Montréal où il y avait des t-shirts de tous les groupes possibles)
Specialized stores ( before I went to Labyrinthe in Montreal where they had t-shirts of every band ever)

B.G.