


Bonjour!
Aujourd’hui je vous présente deux mini-bricos pour votre
chambre, soit un terrarium et un fanion. Ces deux petites touches sont
parfaites pour ajouter du nouveau à votre chambre pour le printemps. Tout est
plus mignon en petit format non?
Hi!
Today, I
have two « mini » Do-It-Yourself for your room; a mini-terrarium and
a mini-pennant. These two little touches are perfect to refresh your room decor
for spring. Everything is cuter in small format, no?
1 - Mini-Fanion | Mini-Pennant

 |
| me with my crazy hair |

1)
Après avoir choisi votre tissu (préférablement
robuste), insérez-le dans votre anneau à broder et tracez votre slogan à la
mine
2)
Si c’est votre premier essai de broderie,
consultez ces schémas et n’oubliez pas de n’utiliser qu’un seul brin du fil, en
pinçant légèrement le fil en tirant le brin.
3)
Ensuite, avec une fine aiguille, commencer votre
broderie, devant une émission de télé par exemple.
1) After choosing your fabric
(preferably a sturdy one), put it in your embroidery ring and draw your slogan.
2) If it’s your first time embroidering,
check out those plans and don’t forget to only use one strand of the thread, by
lightly pinching the thread while pulling one strand.
3) Then, with a small needle, begin
your embroidery, in front of a good TV show if possible.


4)
Une fois la broderie terminée, tracez la forme
du fanion, et ajoutez 4 cm (1,5 po) en haut et découpez-la.
5)
Mesurez la longueur de crayon nécessaire,
environ 1 centimètre de moins que la largeur de votre mini-fanion.
6)
Coupez votre bâtonnet de crayon.
7) Placez le crayon au dos de votre broderie et
repliez l’excédent de tissus par-dessus, marquez où coller/ coudre.
4) Once the embroidery finished, draw
the pennant shape and add 1.5 inch (4 cm) on top, then cut it.
5) Measure the pencil length needed,
approx. 0.5 po (1 cm) less than the width of the pennant
6) Cut the pencil stick
7) Place the stick on the back of the
pennant and fold up the excess fabric on top, mark where you need to
glue/stitch it.

8)
Collez (où cousez) l’excédent pour créer un
rabat où l'on glissera le crayon.
9)
Glissez-y le crayon et collez aux extrémités les
bouts de votre ficelle.
8) Glue (or stitch) the excess fabric
to create a flap to pass the pencil.
9) Glide in the pencil stick and glue
the extremity to your string.

2 - Mini-terrarium
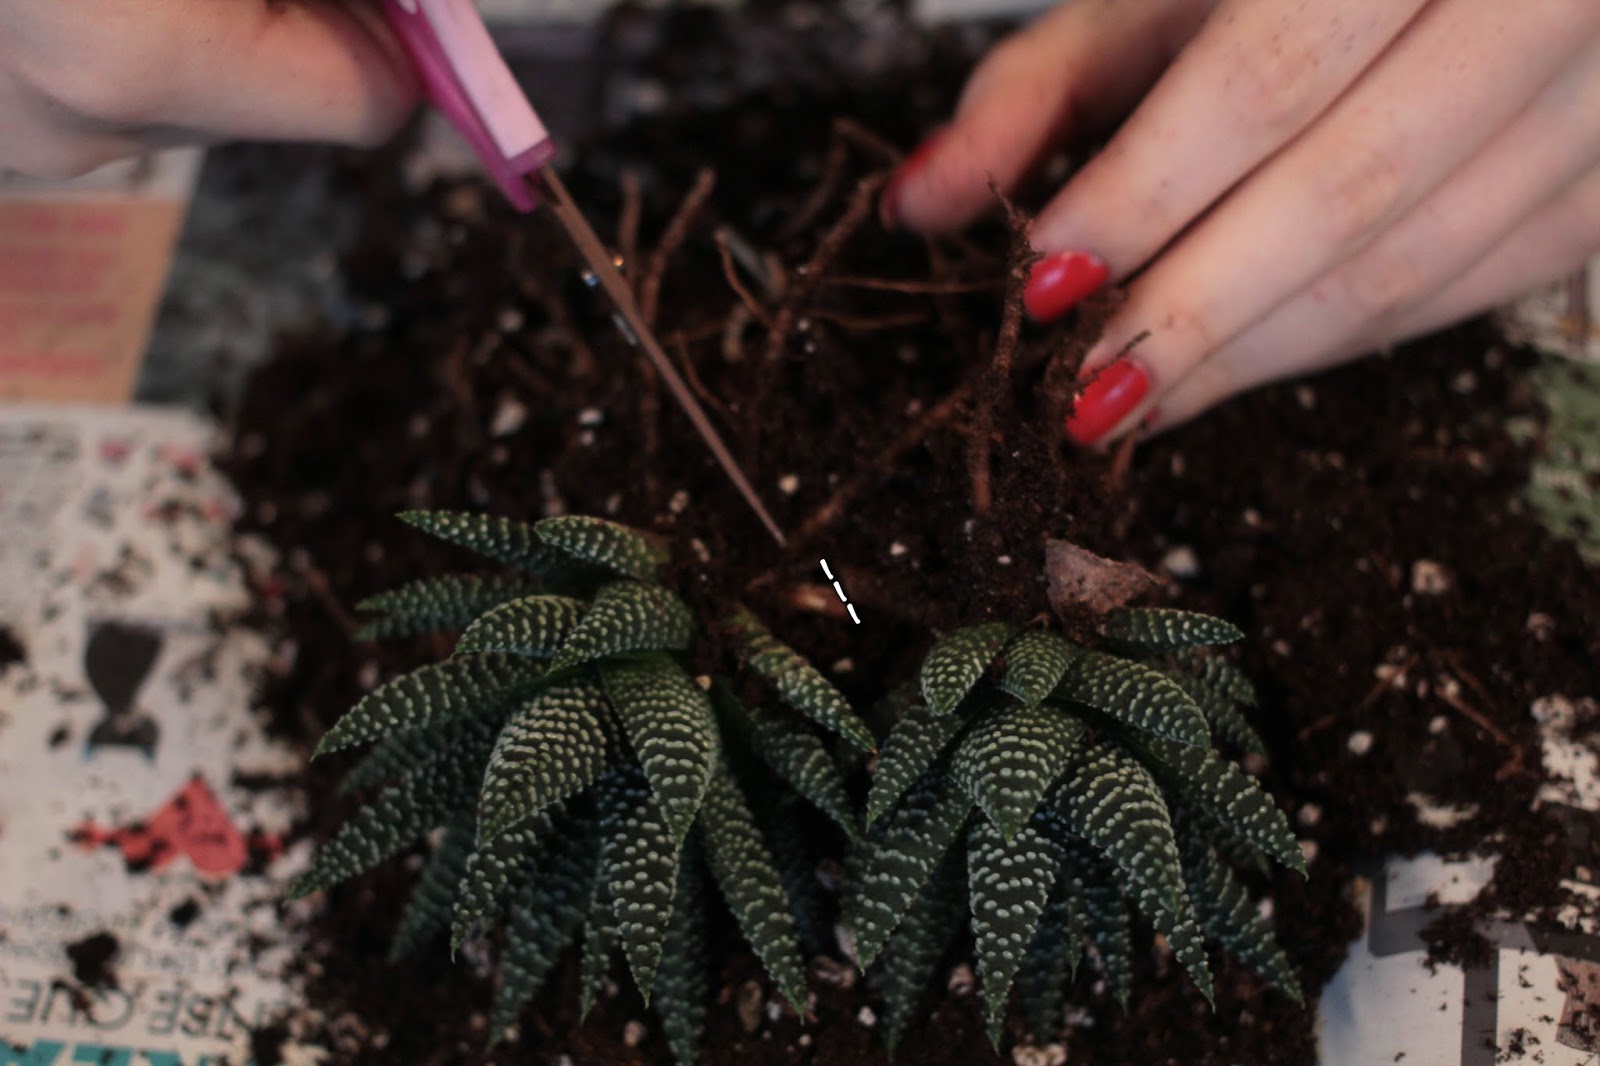
1)
Séparez vos plantes (si elles viennent dans le même
pot). Si vous avez à couper des racines, faites-le en biais.
1) Separate the roots of your plants
(if they came together). If you have to cut any roots, do it diagonally.

2)
Le récipient est en fait une boule de noël en
plastique transparent, on a enlevé le ruban et coupé l’attache en plastique.
4)
C’est le temps de peindre le design de votre
choix, des lignes, des contours, un cœur… dans notre cas c’était l’astuce pour
cacher le logo sur nos boules.
4)
Créez un support pour la boule, soit avec des la
colle chaude placée stratégiquement sous la boule ou avec de la pâte FIMO.
2) The recipient is in fact a plastic
Christmas tree ball; we took the ribbon off and cut off the tie.
3) It’s now time to paint the design of
your choosing, stripes, outlines, hearts; in our case it was the trick to hide
the logo of our ball.
4) Create a support for the sphere,
done with strategically placed hot glue or a ring of FIMO.

5)
Transplantez votre plante dans votre mini-vivarium
et ajoutez-y des mini-habitants!
5) Transplant your plant in your mini-terrarium
and add mini-habitants!


Merci à Sophie pour m’avoir aidée! Thanks to Sophie for helping!
B.G.
Aucun commentaire:
Enregistrer un commentaire
Laissez vos commentaires ici